Within the application, all transactions on one of your bank accounts are shown on the Account Summary page
How do you get to this page?
- From the menu select Financial - Account Statement or
- At the top left of the search window, type 'Account Statement'
The Account Summary page has 2 formats - Tiles and Overview. You will automatically end up in the Tile format, see the following example:
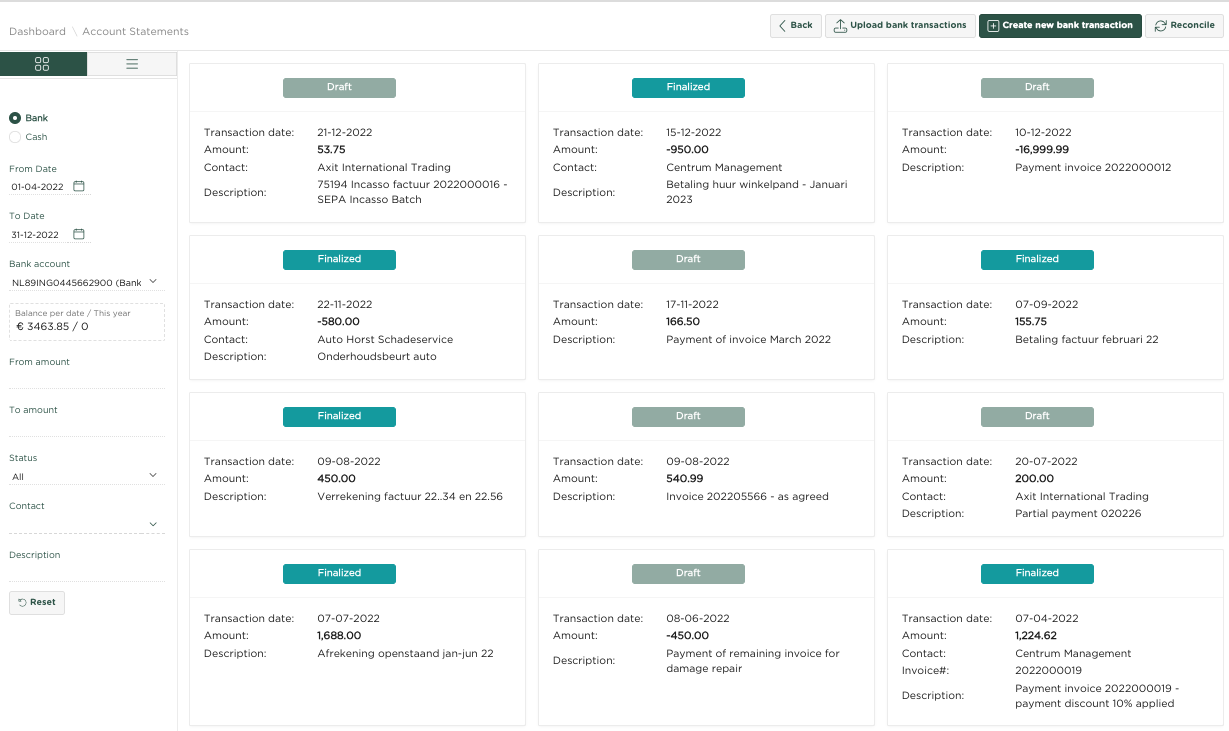
As the example shows, a Tile is shown for each transaction. If we select one of the tiles, we will see the following dialogue:
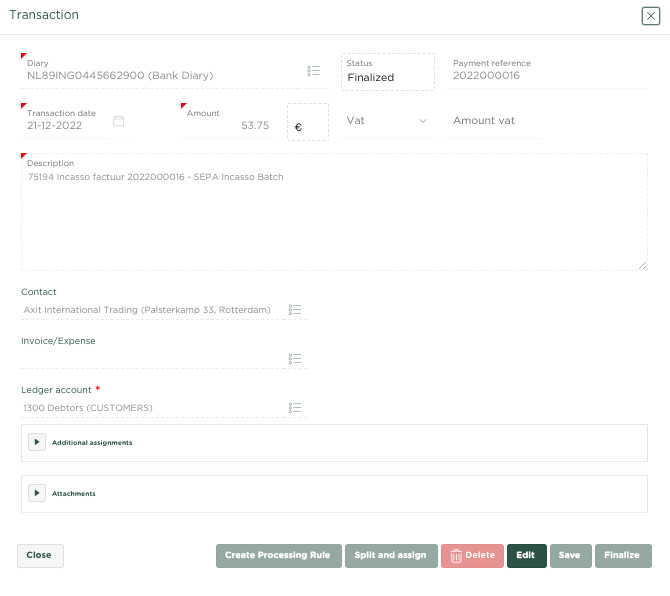
The above example shows a transaction that has already been processed and therefore has the status Final. We can only do something within this card if we first press ![]() .
.
In the following example we show how to select a transaction that has not yet been processed and therefore has the status Draft.

The example shown shows that we now have the option to assign the transaction to an Invoice or Expense, we can possibly adjust the description, assign a Contact and also the General Ledger account to which the transaction should be posted. Once the desired allocation has been made, the transaction can be processed by pressing ![]()
If we have chosen the Overview format, a report overview of the transactions on the selected bank account will follow.
See the following example from the Account Statement overview page

This page shows transactions on the bank account selected on the left side of the page, within a date range also entered on the left side of the page.
Bank transactions can be included in your administration in the following ways:
- Automatically - Via the Bank link, you hereby give permission to the bank to share data with Yoursminc Online Bookkeeping - See
- Importing Bank Transactions (changes) file from your bank's internet portal. The most commonly used formats (CAMT053, MT940 and CODA) are all supported
- Enter the transactions manually yourself
We will now describe the manual entry of Bank transactions in this article
To manually enter a bank transaction, we look at the following example:
Press ![]() , after which the following window will be displayed:
, after which the following window will be displayed:

In the example shown, we enter the turnover of a fair of € 2,550, for which we indicate that the VAT rate of 9% applies, after which the VAT amount is automatically calculated. We enter a description and assign the entry to general ledger account 8040 - Turnover sales low rate. By pressing ![]() the transaction is definitively recorded and processed within the general ledger. The Account Statement is automatically updated, showing the transaction just entered.
the transaction is definitively recorded and processed within the general ledger. The Account Statement is automatically updated, showing the transaction just entered.

Status
We see that the overview shows a status for each transaction:
- Draft - Transaction has been entered, but not yet posted within the general ledger, you can now check the transaction and adjust it if necessary before making it Final.
- Final – Transaction has been entered and posted within the general ledger. You are still able to adjust the transaction if you would like.
As you can see, you can also select a status in the left pane of the page, which is set to All by default, so that the Account Statement shows transactions of both the Draft and Final status.
This can be useful in the situation where you have several transactions of both Final and Draft status and you want to focus on only the Draft status transactions to process them. Then choose status Draft in the left pane of the page, as in the following example:

The overview now only shows the transactions that still need to be processed